
Engine power on a homemade minitractor. Do-it-yourself mini-tractor: how to make the best home-made options

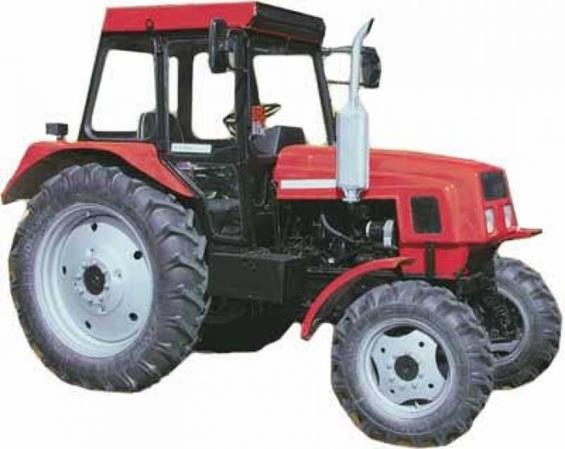
A minitractor is exactly the same agricultural machinery as a tractor, but with a slightly lower productivity sacrificed for maneuverability and economy. In addition, some copies are so light that they are transported in a trailer.
Small tractors perform all the same tasks as analogues of a higher class. They can also attach attachments for processing and fertilizing the soil, cleaning the territory and transportation of various goods. In addition, in many tractors, even those made independently, there are a drive for rotating auxiliary units and hydraulics.
It differs from the motor-block, first of all, by the fact that it is full-fledged agricultural machinery. Of course, a powerful motoblock also has considerable functionality, but when managing it, they have to walk all the time. This is very tiring, especially when processing a large area of arable land. And making it a self-propelled machine, even the smallest, the operator gets tired much less.
Understanding all the advantages of mini tractors, domestic inventors create with their skillful hands, sometimes, first-class copies, and on the Internet now you can find many descriptions, diagrams, and even ready-made drawings of such homemade products.

Constructions of mini tractors
Most of the amateur designers in the manufacture of the tractor simply rework some kind of serial product, adding some components and eliminating others. This is the easy way, but it is not always feasible, because must be available complete machine.
And the design of home-made tractors, created from scratch, is individual in each case, so today the variety of solutions is simply off scale.
For example, the frame for a minitractor is made integral and breaking (called a “break”), the turn is controlled by the wheels and the side, the layout is classical or in the form of separate modules allowing to change the purpose of the apparatus. Install the hydraulic system and the PTO shaft.
The homemade mini tractor offered below is one of the easiest to manufacture and makes it possible to get by with the available materials and parts.

But, of course, those who are going to do something themselves, with their own hands, are recommended to have technical skills, ability to work with a tool and read the drawings. And, most importantly, have a large amount of time and a great desire to do this.
Frame
Make it from metal rolling. Strength calculations are a thankless task (and in this case - not necessary), so you just need to lay down a multiple stock in advance. Based on this, apply the channel from number 6 to 12 - the best solution for a homemade mini tractor. It is not worth doing any "dredging" and "rounding" of the aggregates, since This will greatly complicate and increase the cost of the project. The usual flat "ladder" - simple and accessible to many.

As practice shows for a homemade tractor, it is more useful to use a channel of a larger rolling size (up to 20) as the front and rear beams (crossmembers). subsequently, various working bodies and auxiliary equipment are attached to these crossbars. Moreover, it is better to place it shelves inward. Channels spars (longitudinal beams) can be positioned both inwards and outwards. Inside the side members lay the fuel lines and highways, which are naturally protected.
The shape of the simplest frame design for homemade - a rectangle with two or more traverses, but much more rigidity will have a frame in the form of a trapezoid. The width in the front must be smaller to accommodate the minimum dimensions of the steered wheels, as well as to be able to observe the movement strictly on the arable row.
The joints of the side members and the traverse must be reinforced by welding the kerchiefs.
Layout
The relative location of the aggregates of any tractor has historically been a long time ago.
The classic layout of the self-propelled machine is as follows: the engine is located in front, longitudinally, above the front axle. A gearbox is connected to it through a clutch, followed by a transfer case and then a driving axle. Between themselves, the shafts of the units are connected using cardan and (or) couplings.

Compliance with this scheme will be the best option when creating a mini-tractor, because will allow to apply existing units without changing them.
According to the experience of many creators of self-made tractors, it is better to assemble the units “in place”, without doing excessive drafting and calculations. The best option is to place all the main assemblies and home-made mechanisms on the finished frame, placing them on temporary supports (conveniently on wooden blocks), and finding the best mutual position, to make the mounting brackets.
But we must not forget that all knots on a homemade tractor must be secured through supports suppressing vibrations (rubber pads). It is best to borrow them from the same technology from which the unit is taken.
Another important factor to consider. It is weight distribution, i.e. distribution of the total weight of the minitractor on the front and rear axles. The most acceptable option - 60% of the weight falls on the drive wheels, 40% - on the steered ones.
Engine for homemade
From the point of view of the weight ratio, weight, availability and low cost of repair, it is most logical to use the engine from VAZ classic models in the manufacture of the tractor in “home” conditions - from 2101 to 2107. They can be found in good condition at the price of scrap metal. If you're lucky, one machine can be the donor of most of the details for the minitractor.
The motor with clutch and gearbox is fixed as a single unit, which simplifies the work on the home-made tractor and saves the creator from many difficulties.
Be sure to install the fan impeller on the shaft of the water pump (“pump”), even if it was not there. After all, the speed of agricultural machinery is much lower than that of automobiles, so the mode of operation of the motor of a minitractor is the same as when standing in a traffic jam, which is considered difficult for any engine. Consequently, the heatsink cooling system of the homemade tractor needs a forced blow.
Transmission
As mentioned above, it is desirable to install the power plant on a homemade product entirely. In this case, what subsequently becomes a mini-tractor will already have at least four gears forward and one back. It remains only to agree on the optimum engine speed of the tractor and the desired speed. To do this, it will be quite enough transfer box from any four-wheel drive cars. The most suitable option - UAZ.
By the way, the previously considered components can be used from the UAZ, but they are heavier, the flow rate of the resulting tractor will be higher, and all its power will be rarely used.

A good element for connecting the shafts is the elastic coupling, which is mounted on the output shaft of the VAZ gearbox. By making the flange to the transfer case, you can do without intermediate cardan. But from the “razdatki” to the drive axle the cardan is obligatory, since the loads are significantly higher there, and the clutch will not stand them.
When building a tractor, the drive axle is best used also from a UAZ vehicle with onboard gearboxes. This will increase, firstly, the craving, and secondly, the ground clearance (which it is desirable to bring to 450 mm). The required gauge size of a homemade mini tractor is produced by trimming the stockings of the bridge (narrowing it) or making spacers for attaching the wheels (expanding), because The nominal track of the UAZ is 1445 mm, which does not coincide with the accepted ranges for agricultural machines (1260-1285, 1350-1370, 1490-1515, 1790-1815).
Chassis and propulsion
This system in the considered homemade mini tractor almost completely repeats that of tractors manufactured by industry and differs from the automotive one in some important points.
The main difference is the absence of a rear suspension, i.e., the drive axle is not attached to the frame on the springs, but is rigidly fixed on it. This must be done if it is planned to make not only the tractor itself, but also all the agricultural implements to it with which it is supposed to be used. Since such attachments, such as plows, harrows, mowers and others, attached to the rear of the mini-tractor homemade, very much load the rear axle and, if there is a last rear suspension, quickly bring it into disrepair.
The front axle on a homemade tractor can also be installed without a suspension, comfort will not significantly decrease. It is convenient to use forks of cardan joints of trucks (ZIL, KAMAZ, KRAZ) as turning points, spare parts from which can be found in car fleets and at metal pickups.
Two forks are welded to the beam, or directly to the frame, observing the alignment, and the two forks - to the steering knuckles of the donor car. The steering linkage along with the steering gear is also entirely borrowed.
There is no sense to use the brake system in its “automobile form” on a tractor, which is made by one's own hand. not the speed. Only enough parking brake. However, the mechanism should not be driven from a lever, but from a pedal with a fixed depressed position. Then it will be possible to slow down the home-made product in motion, and fix it in the parking lot.
The wheels are best used from agricultural machines, because they have the right tread, but it is quite possible to adapt tires from SUVs or light trucks, cutting the desired tread pattern (better for herringbone, for self-cleaning). The tire pressure is chosen empirically to find the best combination of comfort and performance.
Electrician on a homemade tractor
You can apply any parts of anything, as long as the voltage of the generator and the consumers match. Do not forget that the battery is a container with acid, so it must be very firmly fixed. The recommended solution is to place it under the seat of a minitractor in a special box, or simply in a fence.

Headlights and tail lights, as well as braking signals, are desirable but not mandatory elements, because to exploit the result of their labors can only be far from other transport.
Road traffic
Not all homemade constructors of mini tractors go on public roads. And this is correct, because In our country, a number of stringent requirements are listed that must be met by vehicles traveling on them. Even if everything turned out well, and the product meets all the requirements, certification will be required to confirm this, which is very expensive.

Therefore, driving on a homemade tractor is prohibited. If you have to deliver it to the place of work, then it is better to do it on a trailer. This is one of the reasons why they try to make homemade products easier.
Today we will talk about how to make a mini-tractor from a motor-block, a motor-cultivator or other aggregates and improvised means with your own hands at home. We also consider technologies, schemes and drawings for self-assembly of mini tractors with vivid illustrations.
Modernization of domestic motoblocks with their subsequent improvement to a small mini-tractor involves the manufacture and installation of an additional module (adapter) or, more simply, the driver's seat, control unit with a steering mechanism and hitch for attachments. As a result of this uncomplicated modernization, a budgetary minitractor is obtained from the motoblock, capable of working with various attachments (plow, tiller, harrow, lorry cart, mower, snow blower, etc.), and which its owner has the opportunity to assemble to rework with his hands.
The landing and steering trailer adapter is suitable for running a small farm or for working on a summer cottage with an area of approximately 2 hectares. The resulting agricultural vehicle is controlled by the steering column and the clutch pedal. The modular trailer is quickly assembled and disassembled, conveniently and easily transported, taking up little space during storage. With the price of the module about $ 700, you get a small mini-tractor, at any time which you can invert on your own into an ordinary walking tractor.
The motor-block landing trailer gives an answer to a simple but capacious question that is often asked by happy owners of motor-blocks - how to make a mini-tractor from a motor-block yourself? This device is suitable for any domestic motor-block of the Russian production. The method of coupling the steering module with the motor block is carried out by a simple standard connection using three coupling bolts, as in the case of coupling with any attachments. With such a landing-trailer modular unit, resulting from a motor-block, a minitractor can reach speeds of up to 40 km / h.

The adapter has a convenient control, which includes a forward lever, steering wheel, gas pedal and reverse. Made tow hitch completely from standard spare parts of domestic production. It can be purchased complete with a walk-behind tractor, already assembled, or separately, as a set-top box, which is easy to attach to a walk-around tractor on your own. Also, the manufacturer is ready for a certain cost to alter the landing-steering adapter for your motor-block, having made fastenings for any type of attachments.
This mini tractor is driven by turning the rear wheels. The minimum turning radius is 3.5 m, but due to the presence of a backing, this value is halved. Such a garden tractor made of a motoblock, according to the manufacturer, has sustained positive feedback, it is very compact and maneuverable, and therefore effective in a small summer cottage. Any attached equipment is installed on the rear part of the steering adapter, and the steering mechanism is convenient while the mini-tractor is in motion, greatly simplifying its operation.

A mini-tractor was assembled from a motor-block or a motor-cultivator (hereinafter MT) mainly from serial units and aggregates of its own machinery. All of them had, of course, to sort out, renew the worn parts. At the same time, the serial units and assemblies used should not be subjected to radical alteration. Firstly, because in the event of the failure of any of them, the replacement will not present any particular difficulties. Secondly, he was convinced: the alterations that some amateur designers willingly go for, thunderstorms, sometimes a decrease in the strength and reliability of what is being reworked.
Take, for example, the primary shaft gearbox from the car GAZ-51. Using the KP-51 in the design of a homemade mini tractor, it is difficult to resist the temptation to shorten it. But after all, cutting the shaft, remove the most, perhaps, valuable - the slots. And now, to secure the sprockets, gears, etc. on the shaft, you have to drill a bolt hole in it or pry through a keyway. Superfluous, in my opinion, work! In addition, the bolt is not a spline: with a large load it can simply be cut off. But be self-made prudent, do not shorten, save the shaft - no problems will arise. The splines are easy to put on a clutch disc with lining removed, to which elementary detail can be attached: flange, sprocket, etc. In addition, there is enough space on the shaft to install additional power take-off devices for other units: water pump, mowing machines, circular linden ...

There are no alterations, there are no alterations in the power unit, in the capacity of which the practically reliable engine from the GAZ-69 engine with a capacity of 55 liters was used. with, together with its gearbox (having three speeds forward and one back) and clutch. Torque from KP-69, which is in this case the primary gearbox, is transmitted to KP-51 directly, without “soft” connections, thanks to the flanges, fastened tightly with bolts. Similarly, the KP-51 is also connected to the cardan flange installed on the main drive gear. Distortions here, of course, are not allowed.

The exact center of the longitudinal line of installation of successively connected power transmission units from the engine to the rear axle wheels can be observed if the preliminary assembly itself is carried out, as they say, in weight, placing everything on supports so that the nodes are in the same horizontal plane. Having achieved the absence of beats, the bolts on the flanges (couplings) are rigidly fixed. Then they transfer the construction to the mini-tractor frame, which is an isosceles trapezoid (2400 mm high, with bases of 680 mm and SS0 mm), made of 120X50 mm channel for welding, wide buttocks out.
Power and running knots are fixed “in place”, producing the final adjustment of the kinematics (so that there is no distortion anywhere). Then test the entire structure. Let the engine idle for a while, for which the rear wheels are raised above the ground on the box. Making sure that everything is in order, install the remaining components and parts. In fact, I am not a supporter of blindly copying someone else’s, even if the most successful, development.

I am convinced that it is more rational to focus only on the scheme chosen as a prototype, using in its design the details and possibilities that this home-made industry has. Therefore, talking about the MT-7, I deliberately omit the description and the specific dimensions of the brackets, spacers and other "small things", especially the attachment of certain parts and assemblies. Everyone will decide the issues arising in the manufacture of a mini-tractor, including the replacement of, say, the second, additional gearbox from a GAZ-SI car with a power take-off and oil pump NSH (which, let's say, It was not at hand) on similar, taken from another technique. Compounding them into a single whole, it is only necessary not to forget: in KP-51, the gear teeth are straight, small; others have teeth and their cutting step is different. So, we need and the corresponding power take-offs.
The hydraulic pump is connected by a petrol- and oil-resistant armored standard springs with an oil spreader (of any type) and a hydraulic tank, a power cylinder for lifting mounted machines, a bulldozer shovel, and a tipping body of the trailer.
Instrument panel - combined. The panel is taken from the KrAZ vehicle, the indicator devices are from other machines with 12-volt voltage.
On the right front wing of the MT-7, a rectangular hole is cut out - in order to see the position of the wheel while monitoring its progress during the earthing up.
The "highlight" in the design of the MT-7 is a transforming front axle. The use of this technical solution allows you to easily and quickly change the width of the mines of a mini-tractor, which becomes a truly reliable mechanical assistant not only when plowing a field, vegetable garden, or performing other (usual for such machines) operations; You can finely cultivate men, plant and spud potatoes and other root crops, taking into account the recommendations of science and practice.
The idea I proposed is based on telescopic structural elements moving into each other. In this case, the dimensions of the structure itself vary significantly. For example, when hilling potatoes, the front wheels of the MT-7 move away from each other, and the track width becomes not 1080 mm, as usual, but 1,400 mm. For the beds cut every 700 mm, this is the best option.

And such a profitable innovation is achieved very simply. Instead of a single transverse cap, two channels are taken: 120X50 mm and 100X50 mm, fastened to each other with three Ml2 bolts. The length of the channels, respectively, 680 mm and 730 mm. When expanding the track, the bobs are unscrewed. The upper channel, easily sliding along the lower channel, extends to the required distance (in this case, 320 mm). Then both channels are bolted again.
Naturally, when extending the front axle, it is necessary to increase the length of the transverse thrust. The latter is composed of two segments of steel corners, nested into each other and fastened together by three M8 bolts. When you change the mine bolts unscrew. Spreading the transverse thrust to the desired length, re-fasten the corners with bolts.
Features of the implementation of the remaining components and elements of the front axle are clear from the illustrations. I will only note that from below, in the middle of a 120X50 mm cross-channel channel beam, a sleeve is welded, which is a section of seamless steel pipe 30X5 mm (GOST 8734-75) 120 mm long. The axle is inserted into the sleeve in the form of an M20 bolt passing through the holes in two transverse brackets (made from a 50X50 mm angle), screwed to the frame of the mini-tractor symmetrically relative to the composite transverse beam. The latter is balanced on an axle-bolt, turning when driving on uneven soil at an angle, limited on both sides by stops from an angle of 45X45 mm. The brackets for more rigid fixation are additionally reinforced with two braces connected to the frame of the mini-tractor.
The steering column is from the UAZ-452. My mechanical assistant has it on the right side. Therefore, the mounting of the steering mechanism with the steering gear on the MT-7 itself is not particularly difficult. As for the lever, it is removed from the splines and then, turning, they are again inserted, but in an upright position.

Tie Rod! With all the unusualness of its sliding, concisely stated above construction, it is not so difficult to make this important link. Especially for the one who is well acquainted with gas-surface welding. After all, all that is required is to weld the tips with ball pins to the elementary system of two parts of 30x30 mm that slide over each other, fastened with three M8 bolts ..
So, when hilling, say, a potato, the front left wheel extends together with a channel of 100X 50 mm and a corner of 30X30 mm sideways by 320 mm. Wheel track on the front axle becomes equal to 1400 mm. Increases by the appropriate amount and gauge on the rear axle. But not due to the transformation of the latter, but by installing in place of the left rear wheel of another: a special one, which has a special design.
It is easy to see that it is removable from the usual, used only when working with an extended track, the wheel differs in the welded hub. Located between the “main” and “ring” parts of a disk cut by autogen, the latter increases the length of the rear beam. And instead of the standard for the MT-7 track on the rear axle - 1000 mm - it turns out (taking into account the "car" method of mounting this wheel) 1400 mm.
Unlike the front wheels with tires 6.5–16 (from the Volga car), the rear wheels of the MT-7 have tires from the MTZ-52 tractor, the size of which (6.5–20) makes it easy to mount them on Copes discs from the GAZ-51. Removable wheel is also no exception.

But we will continue further:
Tread pattern - "herringbone." To increase the grip weight of the mini-tractor, it is possible to recommend turning-up of removable loads or filling the chamber through the valve with about 2-D volume of water (with the onset of low temperatures - with a 25% aqueous solution of calcium chloride, which freezes at minus 32 ° C). With an increase in soil moisture, when the interconnection of its particles is disturbed, the increase in thrust force by the above method is not ensured. In these cases, it is advisable to reduce the pressure in the tires.
The rear axle from the GAZ-51 is attractive to many amateur mini-equipment designers. Its reliability, availability, finally. But here's the length ...
On ZM stockings, the rivet caps are cut off with a sharp chisel and with the help of a piercer they “sink” them inside, in order to then carefully knock the stockings out of the body with a sledge hammer. If necessary, sometimes it is necessary to warm the seats with a blowtorch. And in order not to suffer later during assembly, achieving accurate alignment of mutually conjugated parts with each other, - take care of timely applying special scratches on the stockings and differential housing (chisel, until the components are separated).

Stockings are cut through the diameter of the seating surface to the spring cushion, after which the left cutter is shortened by 180 mm, and the right one - by 235 mm from the side of the differential. Cropped stockings are inserted back into their landing nests. And in order to fasten them thoroughly, through the old holes in the differential, where the rivets knocked inside were previously, new holes are drilled in the chupka. The old ones (or specially made with a diameter of 0.1 mm large) rivets are driven into these holes and sealed flush with electric welding. After assembling the entire bridge, it is installed on a mini-tractor. To the frame, this 3M is mounted on bolts Ml2, passing through the holes, prudently done in the right places. Size A is chosen such that the minimum track width along the rear axle is 1000 mm.
As for semi-axes, they are drilled from the side of the flanges strictly in the center to a depth equal to the thickness of the flange itself. The diameter of the drill bit is slightly less than the diameter of the semi-axis. Further, the semi-axis is machined along the drill diameter to the appropriate length (see fig., Size B). For the right axle it will be 235 mm. and for the left - 180 mm. Each is inserted into its flange and is brewed thoroughly on both sides (use electric welding, not autogenous!]. So that the metal is not “released”, the semi-axis with the flange is periodically cooled with water. Then the semi-axes are shortened, removing everything unnecessary with a lathe.

More to the power system bought a new battery. Air filter decided to leave the tractor. It is, of course, large-sized and requires maintenance, but very effective. Now about the newly made frame. Although it is spatial, it is quite simple. It is based on two spars made of steel angle-equal angle No. 4 (40x40x4 mm).
But the corners while joined along the length of the edges of the shelves and welded into a square tube. The spars are made composite, because they had to change the distance between them and raise the back part over the front. The front part of the frame is narrower than the rear - for the possibility of turning the guide wheels. In addition, it is a two-tier. This is due to the need to fit the frame at the same time to dissimilar units - the Muscovite engine and Chinese transmission assemblies, as well as to the suspension of the front axle.
In this case, the beam to the frame is suspended by means of a transition plate, used from the same Chinese mini-tractor, but modified. Part of the plate is simply cut off as unnecessary, and new mounting holes are drilled in the ears of the remaining part. So that the beam did not hang on the central pivot and did not knock on the frame, thick rubber cushioning pads were attached to the side members in these places.

The back of the frame is also spatial, but here the spars are simply bent up at a steep angle, and then again directed in a horizontal plane. Such a bend was required in order to dock, and attach the frame to the rear axle beam on top - there were already M12 threaded holes. With their help, here earlier (in the standard version) wings were fastened to the beam through rather high spacer sleeves.
Now the place of the spacers occupied the pipe spars and even gaskets made of hard rubber. The transverse elements of the frame a little - two traverses and submotor crossbar. They are all in front of it. In the rear part, the link to the frame is the rear axle beam. The bumper can also be considered a part of the frame, but it is made as a separate element and is attached to it with four M12 bolts. I made a new bumper - more massy and more dimensional than a regular one, assuming in the future to hang a fur-clad bucket on it.
It should be noted that the holes in the frame for fastening components and assemblies were drilled mainly in place, after careful alignment of the latter. The rear axle is used completely “Chinese”, but the wheels here had to be adapted from the “Belarus” tractor, although the tires on them are regular too. A hitch for connecting tillage implements together with a single plow was bundled (or rather in the “under-set”) mini tractor.
But since the engine installed a more powerful one, in order to increase productivity during tillage, he made one more share of the first model and similar to the plowshare and an additional unit for mounting it on the plow. And so that the machine does not slip due to lack of mass with such efforts, heavy cast-iron wheels were attached to the wheels. Since from the very beginning the mini-tractor was supposed to be used as a tractor for a cargo trailer from a passenger car, I made a ball forcopier for coupling with it.
But in this node, the homemade is only a docking element, and the ball is of industrial production. The trailer (it is self-made) coupling device is also of industrial manufacture. Technical requirements prohibit the use of handicrafts in devices of this type.

True, the pitch hindrance prevents free access to the power take-off shaft (PTO), but so far this mechanism has remained untapped and is covered with a plastic cap. It should be noted that most of the controls: the steering mechanism, the braking system, the clutch were in order at the mini-tractor, and I used them practically without alterations. Only in connection with the increased distance to the front axle had to lengthen the longitudinal tie rod.
It is worth noting that the steering of the tractor is quite simple and does not have a trapezoid. Swivel levers on the axles of the wheels are interconnected by one transverse thrust. In the hydraulic system, there was no pump and oil fine filter.
These units came without adjustment and alterations from domestic tractors. This fact indirectly confirmed the version heard on the market that the tractor was designed in our country. There were no light signaling devices in the acquired nodes, and therefore they had to be purchased and installed anew. Headlights - from agricultural machinery, turn lights - from the car "Niva", the rear blocks of signal lights - from the "Volga" GAZ-24.
The engine for this mini-tractor was used from the Vyatka-150 M scooter. It will also come from the Tourist, which is no less popular among homemade artists. Its power is 7 p. As practice has shown, this is quite enough for a universal mini-car, the main purpose of which is the mechanization of various kinds of work on the school grounds, as well as clearing the area from snow and transporting cargo on a (also self-made) trailer.
Reliable cooling to the engine provides forced airflow. The launch is carried out by a removable kick-type car. A bushing coupling is installed on the output shaft of the motor (connection Ev. 32X1, 5X20). At the other end, the clutch transmits torque (splined connection 8X32x38) to a not-so-deficient gearbox from the GAZ-69 car.

The output shaft gearbox is connected to a rigid universal joint with the main transmission of the rear axle. As the latter, a corresponding block from a decommissioned electric vehicle was used. This block transmits torque (thanks to a four-way worm) with i = 12: 1 to the drive wheels. As a result, the whole structure has 12 gears: 3 of them are backwards, and all the rest are forward, which allows choosing the optimal mode of engine operation in the designed “Gnome” speed range: from 0.5 to 15 km. To ensure sharp turns to the tractor, and holding it in parking lots, climbs and slopes serves as a band brake.
Moreover, the design of this brake has much in common with similar devices that have found wide application in agricultural machinery of industrial manufacture. And the peculiarity is that the steel tape used from the decommissioned “Niva” combine, with friction linings riveted to it, covers the self-made (St45) brake drum.
The diameter of its working surface is 200 mm, width - 60 mm. When you press the brake pedal, the lever tightens the belt around the drum, braking the tractor. To install the initial gap between the brake drum and the tape is provided adjustment tool. The frame of the mini-tractor is welded, rectangular shape.

It is made of pieces of steel channel number 8. The crossbars also serve as brackets for the installation of the engine, gearbox and other equally important components of the tractor construction. On the ladders attached to it (not shown in the illustrations) and the rear axle of the already mentioned electric car. And ahead, on welded kerchiefs of steel sheet (St45 with a thickness of 15–20 mm), in which holes with a diameter of 30 mm are made (are absent), is the axis of swing of the front axle.
The latter is homemade. Its design is also welded. It is made of segments of thick-walled steel water and gas pipes of the appropriate diameter and resembles the front axle of the Belarus tractor in appearance. Vertical bushings are equipped with bronze sleeves - bearings. The steering mechanism is used from the decommissioned Polish car "Beetle", providing sufficient maneuverability, ease of management, so necessary for the school mini-tractor.
The machine has the ability to turn around without any difficulties even on a “patch” with a radius of just over two meters. The front wheels of a mini tractor with hubs are taken from an end-of-life tractor rake. Tire size 5,00X9 ". You can use other wheels. For example, from the SZA motor-car, having tires 5.00Х 10". The rear - from the driven wheels of the tractor T-16, followed by cutting the tread. It is quite acceptable as leading and driven wheels from other vehicles with tire sizes from 6.5X16 "to 9.00X16".

For example, from the combine SK-4, tractors T 28, T-40. The fuel tank is homemade. You can also take advantage of the finished one - from the “Smoke” furnace produced by the industry, adapting it accordingly. Capacity - 6.7 liters, which allows the mini-tractor to work continuously without additional refueling (depending on the type of work performed] for 3-4 hours.
.
Facing - from sheet steel 1,5 mm thick. Covered with protective auto enamel bright, pleasing to the eye and satisfying the requirements of technical aesthetics colors. Looks good, for example, a combination of yellow with orange or red. Especially if Polish enamel is used for protective coloration. Seat used from decommissioned "Niva".
Provided for adjusting it for all ergonomic parameters, to ensure the convenience of the driver. A counterweight of two ballast blocks from DT-20 sawn in half is located on the front of the tractor frame. Dimensions of each half: 140x50x220 mm. Fastening - on bolts M12, on the inside of the frame.
The design of the school mini-tractor is such that it virtually eliminates accidental contact with the rotating and other components presenting increased danger during operation. Where necessary, additional covers and fencing guards are provided. Of the other design features, the technical solution that allows manual and foot control of the throttles with the help of a single cable attracts attention.

The outer casing attached to the lever serves for manual control (throttle grip), and the steel cord passed through the hole in the coupling acts as a flexible rod from the pedal. According to experts, the implementation of the speed selector lever is not a template. The body here is the handle of the gas from the sports bike "Java".
And as a pulley, on which the steel wire rope is wound, it is used to clean it to the appropriate dimensions (outer diameter 45 mm, groove depth 6 mm | gearshift roller from Vyatka any modifications. The spit has been removed from the roller. Instead, there is a hole for the axle diameter 14 mm. In the cheek, slots are made, ending with holes 6 mm in diameter under the inside ends (like in a reel-reel with tape) the ends of the cord.
As for the trailer, plow, and other mounted implements, they are traditional for the readers of the MK. The frame of the trailer, in particular, is made of segments of steel thick-walled water-gas pipe. Suspension - on shortened to 650 mm springs from the car GAZ-69. The wheels in the chains of greater unification of the design are taken again from the decommissioned tractor rakes. The plow is not much different from the drawing and description of which is given, for example, in No. 7 of the journal for 1981.
The basis of the design can be a skimmer from an old mounted plow with a reflector welded to the blade, provided with a base plate of high-quality structural steel. Chisel and hillocks are recommended to use factory made. Let's say from a decommissioned cultivator. The snow dump, which can be equipped with a mini-tractor, is, in its essence, a mini-bulldozer mounted on special rigid rods. It is made of 8-mm steel sheet (StZ), slightly bent in a vertical plane, 550X1100 mm in size, reinforced from below with a 75 mm wide plate-knife (from a Zilov spring that has become unusable.) The use of a harrow and other trailed implements is not excluded. And for decompression the top layer of the soil is also a flat-cutter.
It was taken from a decommissioned truck (the brand does not play a role in this case.) Fortified from behind, on a crossbar. The Gnome mini-tractor has been intensively used in school for years, and there were no other malfunctions in all this time. MAIN CHARACTERISTICS OF THE MINI-TRACTOR "GNOMIK"
Dimensions, mm ....... 1000X1965X1300
Base mm .............. 1300
Track width, mm ........... 850
The minimum turning radius, mm ..... 2500
Ground clearance, mm .......... 280
Engine - gasoline, two-stroke, with forced air cooling, "Vyatka-150 M"
Engine power, l. with ..... .... 7.0
The number of gears ......... 12 (3 - back)
Maximum transport speed, km / h 15
Minimum working speed, km / h ..... 0.5
Structural weight, kg ......... 550
Loading capacity of the trailer, kg ....... 1000
In order for the mini-tractor to stand idle, you need to take care of a set of various mounted and trailed agricultural implements. And above all, for high-quality plowing, mechanized planting (say, the same potato, other valuable crops), inter-row processing and harvesting of the grown crop.
I recommend for plowing to get one- and one and a half pound, which can be done on their own. These tillage implements are installed in the sockets of a special frame: welded, from a channel of 80X X40 mm (see illustrations), a special adjustment mechanism, a rubberized wheel and an actuator for the hydraulic actuator of the suspension. And since the MT-7 when plowing, the right wheels go along the furrow, the plows are pre-installed with such a deviation from the vertical to the right, so that during operation they take a perpendicular position (compensation is given by the very inclination of the mini-tractor body).
Accordingly, the sock of each plow must be rotated by 1-2 degrees, but to the left. Then the resistance of the earth, “selecting” all the gaps, will turn the machine (again to the right), and both guns will be in the longitudinal plane of the mini-tractor.
The cutting of ridges is carried out with three hillers (see the corresponding illustration). When planting tubers, the hillocks are rearranged, respectively, to other nests, and at one approach of the mini-tractor, the tubers planted in the prepared furrow are filled with both eyeblocks from the two sides. At the same time, the third hiller, located 350 mm to the left of the second one and slightly behind it, cuts a new furrow for planting the tubers of the next bed. That is, in a single pass, the MT-7 performs both the collapse of the previous one and the preparation of a new groove.
When hilling potatoes, the front axle, as already mentioned, moves apart from one, left side to a gauge of 1400 mm. The rear left wheel is replaced by another - special, with welded elongated hub. And damage to the processed potatoes does not occur.
Self-made mini tractors are ideal for processing small plots of land. Practically any person who knows at least a little about technology can assemble a mini-tractor with his own hands.
On the technical characteristics, the homemade product is significantly inferior to the factory models. But using a powerful tractor in small areas is at least not rational. Even maintenance costs and fuels and lubricants are not justified. But a small tractor, assembled with his own hands, is very appropriate. In this article we will tell you how to make a mini-tractor at home.
Advantages and disadvantages of homemade compact tractors
A mini tractor made by hand is much cheaper than factory models, and in terms of its functionality it can sometimes give odds to more powerful tractors. Homemade products can be used in vegetable gardens and orchards, for processing acreage (not exceeding 10 hectares), transporting small loads and harvesting.

The cost of such a machine pays off in just one season.After all, the main components and mechanisms are usually removed from broken equipment or purchased at bargain prices. Some farmers will convert other equipment to a mini-tractor. In this case, the process of manufacturing technology is greatly simplified.
Among the shortcomings can be noted the difficulty in the selection of suitable parts. In addition, if some nodes fail, problems with replacement or repair may occur. After all, whatever one may say, and the tractor is assembled from junk, so some details cannot be found.
To prepare the drawings, you must have technical skills and knowledge. After all, the mini-tractor must work with mounted and trailed equipment, for this it is necessary to calculate the engine traction.
Tip! Assembled with his own hands a mini-tractor, you need to register with the traffic police. Otherwise, when leaving the road homemade can go to the parking lot, and you will write out a fine.

We prepare drawings
Some craftsmen are able to collect any equipment, having only a bunch of old iron and the general plan of work that is kept in my head. There are only a few such people and if you are not one of them, you must first prepare the drawings for the main components of the future car.
If you do not have the necessary knowledge, you can ask to make drawings of friends or acquaintances. Finally, the necessary information can be found on the Internet.
With the drawings at hand, assembling a mini-tractor at home will resemble a children's designer. That is, you take part A and connect it with clutch B.
It is worth noting that some components and parts, which will consist of home-made, may need to be adjusted or further processed. You have to agree, to explain to a turner or a welder, that it is much more convenient from them not on your fingers, but having a ready draft and drawings on hand.
By the way, at this stage, you need to decide what kind of mini-tractor you want to do with your own hands. For farmers, the 4x4 break is very popular. This is a small articulated (breaking) frame with four-wheel drive. This homemade best for farm work.

How to assemble a mini-tractor with their own hands
Having prepared the diagrams and drawings, it is necessary to find suitable parts. At a minimum, you will need the engine, transmission, frame and steering. Find the necessary parts at home is very problematic, so you can walk through the tusks and look through the sites for the sale of spare parts. Here you can literally get the parts you need for a penny.
Frame
The fracture is usually made of metal channel number 5 or number 9. The structure of this material has an adequate margin of bending strength. Two semiframes are welded from the channel, which are interconnected by a hinge. For these purposes, you can use the drive shafts from the truck.
If the turning point does not suit you, you can make a mini-tractor on an all-metal frame. This design usually consists of four elements: the right and left side members, the front and rear traverse.
Spars can be made of channel number 10, the rear and front beams from channel number 16 and number 12, respectively. A metal bar can be used as a transverse beam.

Engine
.
Transmission
For work, a mini tractor made by hand, can be equipped with any engine of suitable power. The best option is a power plant with a capacity of 40 horsepower.
Most often, M-67, MT-9, UD-2 and UD-4 engines are installed on self-made units. There are models equipped with an engine from domestic cars of the Zhiguli or Moskvich series.
If the home-made will be made according to the 4x4 formula, the M-67 unit will need to increase the transmission ratio, otherwise the power plant will not have enough power to provide the necessary force for the wheel sets. Please note that an additional cooling system may be needed for the power unit.
Transmission
The gearbox and PTO shaft can be removed from the GAZ-53. Clutch fit from the old GAZ-52. In finished form, these nodes do not fit, you will need an additional fit.
To synchronize the clutch with the engine, you will need to weld a new clutch basket and adjust it to the required dimensions. At the flywheel of the engine will need to shorten the rear plane and drill an additional hole in the center. These operations can be done on a lathe.

Steering
This unit should include hydraulic cylinders, this will provide the mini-tractor with better handling. It’s impossible to make a hydraulics system at home. Therefore, it is necessary to remove the ready-made hydraulic system from any agricultural equipment. Note that you need a pump to circulate oil in hydraulics.
Rear axle
You can take a suitable assembly from a car and truck and install it on an improvised structure. It is first necessary to shorten on a semi-axis lathe.
If there is no finished bridge, composite construction from different machines is allowed. The front axle is not a driving axle, so any node that fits the size will do.
Wheels
The radius of the wheels depends on how the mini-tractor will be used. For transportation of goods, disks with a radius of 13 to 16 inches are better suited. For agricultural work will need wheels 18-24 radius.

A mini-tractor made by hand should give out about 2,000 engine revolutions when plowing at a speed of 3 km / h. To achieve these indicators, it is necessary to adjust the transmission scheme.
Ideally, each wheel on the rear axle should be equipped with a separate gearbox. At the same time rotation is set by the four-section hydraulic valve.
With such a steering scheme, there is no need for a driveshaft and rear axle differential. For wheel steering will be responsible hydraulics. The necessary equipment (pump and hydraulic cylinder) can be borrowed from the MTZ-80 tractor.
As you can see, making a mini tractor with your own hands is a snap. Despite the fact that this is a rather laborious process, the result will more than cover all the effort. Moreover, to collect a homemade design, this is a very exciting experience.
Related publications
-
 Growing fodder grasses: meadow timothy grass
One of the necessary conditions for the analysis is the systematization of the material in accordance with the accepted classification. So, the tractor is ...
-
 The height of the tractor mtz 82 with a large cab
The MTZ 82 tractor. Due to the excellent combination of its consumer properties and price, the MTZ tractor Belarus 82 remains one of the most ...